A Step-by-Step Guide to Replacing a Toilet and Toilet Flange: Featuring the SuperRing®
In this comprehensive guide, we’ll walk you through the steps for replacing a toilet, the importance of a properly installed toilet flange, and why the SuperRing® toilet flange is the ideal solution for your next project.
Replacing a toilet and its toilet flange might seem like a daunting task, but with the right tools, knowledge, and preparation, it's a manageable DIY project that can save you time and money. Whether you're renovating your bathroom or dealing with a leaking toilet, knowing how to change a toilet and replace a worn-out toilet flange can restore the functionality and efficiency of your plumbing system.
Tools and Materials You'll Need
Before diving into the steps, gather the following tools and materials:
- New toilet
- Replacement toilet flange (SuperRing recommended)
- Toilet bolts and washers
- Adjustable wrench (Adjustable Combination) (Water Pump Pliers)
- Screwdriver
- Putty knife
- Plumber’s tape (optional)
- Bucket or towels (for water drainage)
- Sponge or rag
- Wax ring
- Silicone sealant (optional)
- Caulk gun (optional)
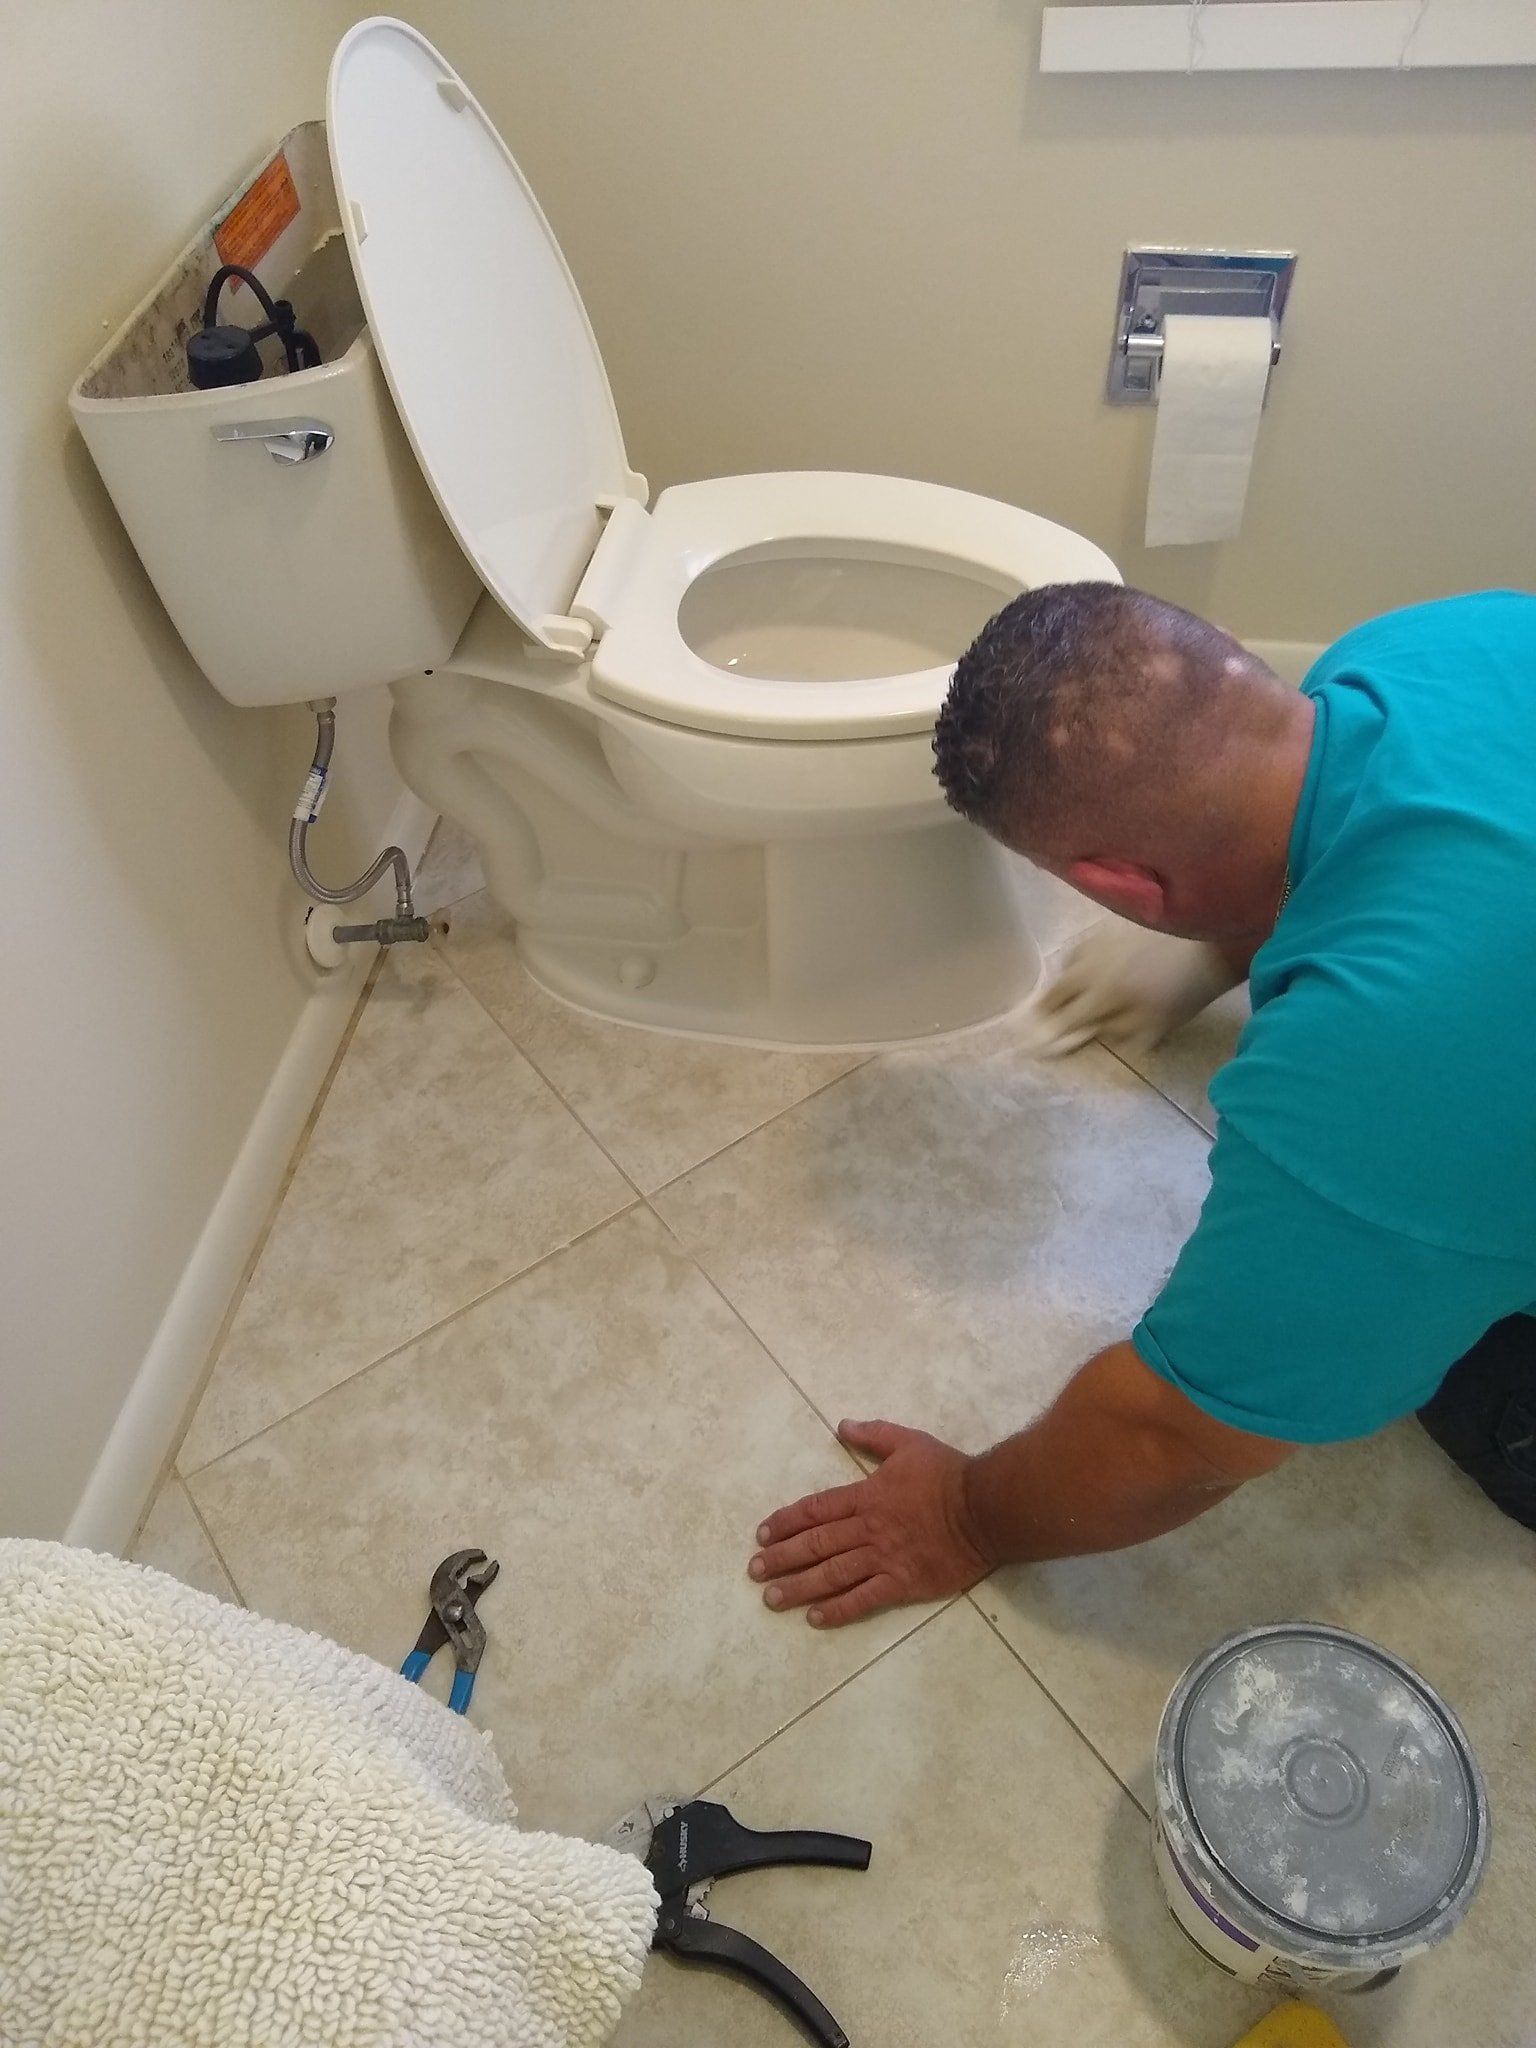
Step 1: Remove the Old Toilet
- Turn off the water supply to the toilet by locating the shutoff valve behind the toilet. Turn it clockwise to close.
- Drain the tank: Flush the toilet to drain out as much water as possible. Use a sponge or rag to soak up any remaining water in the tank and bowl.
- Disconnect the water supply line: Use an adjustable wrench to disconnect the water supply line from the toilet tank.
- Remove the toilet bolts: Use a wrench or screwdriver to unscrew the nuts on the toilet bolts at the base of the toilet. If the bolts are rusted, you may need to use some penetrating oil to loosen them.
- Lift the toilet: Once the bolts are removed, gently rock the toilet back and forth to break the wax seal. Carefully lift the toilet off the flange and set it aside.
- Clean the flange: Scrape off any wax residue from the flange using a putty knife. Clean the area around the flange to prepare it for the new toilet and flange.
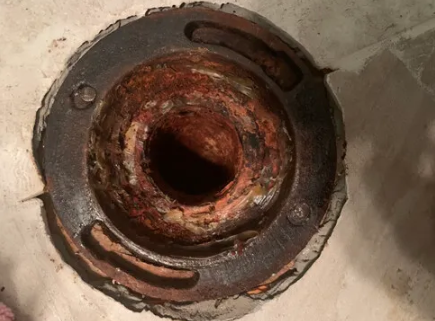
Step 2: Inspect the Toilet Flange
The toilet flange is an important component that connects the toilet to the drainpipe and seals the drain opening. A damaged or corroded flange can cause leaks and foul odors. In many cases, the flange needs to be replaced when installing a new toilet.
- Check for damage: Inspect the toilet flange for cracks, breaks, or corrosion. If it is in poor condition, it’s essential to replace it to ensure a secure seal between the toilet and drainpipe.
- Height of the flange: The flange should sit at floor level or slightly above the floor. If the flange is too low, you will need to raise it with a flange extender.
Step 2A: Applying the Wax Ring
One of the key components for ensuring a secure seal between your toilet and the toilet flange is the wax ring. It creates a watertight barrier that prevents leaks, odors, and potential water damage. Here’s how to properly apply the wax ring before installing the toilet:
Why Use a Wax Ring?
A wax ring is an essential component of the toilet installation process, as it provides a durable seal between the toilet base and the toilet flange. Although the SuperRing® flange already has a built-in compression seal, you may still need to use a wax ring if the flange doesn’t provide a sufficient seal or if you're installing a traditional setup.
How to Apply the Wax Ring:
- Position the Wax Ring: Start by placing the wax ring on the toilet flange or the bottom of the toilet’s outlet. If you're using a traditional wax ring, it’s typically a good idea to position it directly on the flange, ensuring that it’s centered around the opening.
- Check for the Right Fit: Make sure the wax ring fits snugly around the flange. If necessary, use a second wax ring for added sealing power if the flange is too deep or if you want extra security against leaks.
- Press Down Firmly: Once the wax ring is in place, gently press the toilet onto the flange. As you lower the toilet, the wax ring will compress, forming a seal between the toilet and the flange. Be careful not to move the toilet too much, as shifting can disturb the placement of the wax ring, which may result in an improper seal.
- Avoid Over-tightening: When the toilet is properly positioned, tighten the bolts just enough to secure the toilet to the flange. Over-tightening can crack the toilet or damage the flange, so it’s important to apply only moderate pressure.
Wax Ring Maintenance Tip:
If you notice any leaks around the base of your toilet after installation, it could indicate that the wax ring was improperly seated. In such cases, the toilet may need to be lifted and the wax ring re-applied. Make sure the flange and toilet are both clean and free of debris to avoid disturbing the new seal.
By following these steps, you’ll create a long-lasting, leak-free seal, ensuring that your new toilet installation is smooth and secure.
Step 3: Installing the New Toilet Flange
If you’ve determined that the toilet flange needs replacing, here's where the SuperRing flange comes in.
Why Choose the SuperRing Toilet Flange?
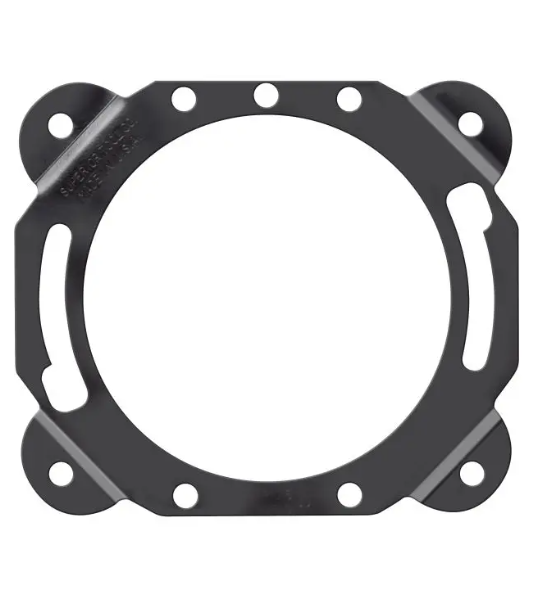
- Quickly repairs wobbling, loose or leaking toilets
- Slotted to fit 1/4" or 5/16" toilet mounting bolts
- Securely tightens the toilet directly to wood or concrete subfloors
- Powder-coated, heavy-gauge steel for corrosion resistance and long lift
- Patent Pending—the original SuperRing is only available from Superior Tool
- 12 pack
- Proudly made in the USA
Share This Blog
See More Post